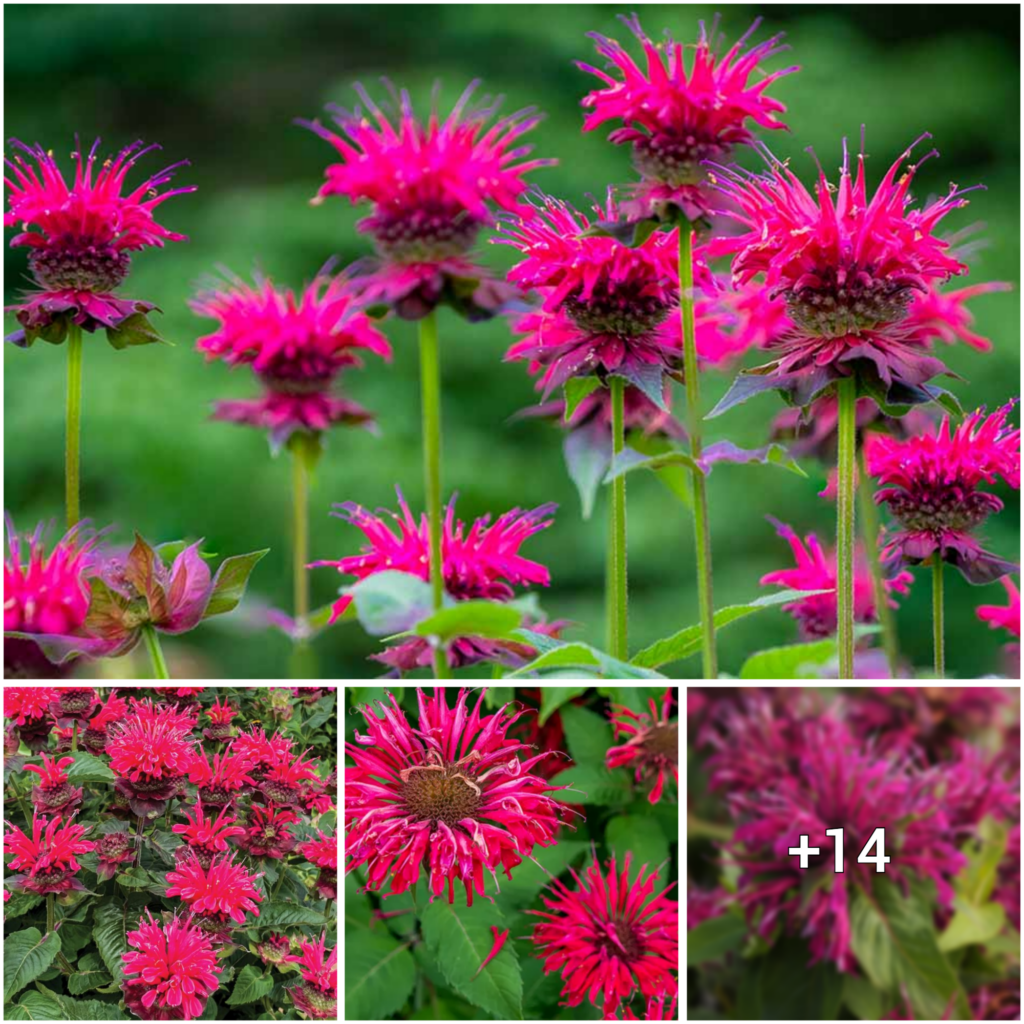
Pentas, also known as Egyptian stars, are flowering plants that bear tiny star-shaped flowers clustered on green foliage. Although they are considered tender perennials that can survive in USDA plant hardiness zones 10 and 11 for years, these plants are usually grown as summer annuals in most parts of the United States due to their fragile nature. Pentas are perfect for adding color to your garden from spring until fall and are loved by hummingbirds and butterflies. They come in a variety of colors, including white, pink, red, and lavender, and can be grown in pots or in the soil with ease.
When planting pentas, choose a spot that receives full sun and has no danger of frost. They require 6 to 8 hours of direct sunlight each day, but the hours do not need to be consecutive. In southern climates, they can tolerate partial shade, while those grown in northern climates may become leggy and have inhibited blooming if grown in partial shade. By following these simple care tips, you can enjoy beautiful pentas in your garden all season long.

To maintain healthy growth for your pentas, it is important to monitor their watering needs. Rainfall of 1 to 2 inches per week is necessary for pentas grown in the ground, and if you notice wilting or dry soil 1 inch below the surface, it’s time to supplement their water supply. For window boxes and containers, more frequent watering is necessary as they dry out quickly and may require daily watering during the summer months. Ensure that the plants are watered thoroughly until water runs through the bottom of the container.
Before planting pentas in a flowerbed, prepare the soil by removing debris and adding compost or well-rotted manure. Dig holes twice the size of the root ball and plant the pentas at the same depth as they were in the original pot. After planting, water them well and ensure the soil is firm around the roots to remove any air pockets. For containers, create a lightweight potting mix by combining equal parts peat moss, compost, and vermiculite or perlite. All-purpose potting soil is too heavy and will compact easily with repeated watering.
Fertilizing pentas is crucial for healthy growth, especially for plants in containers. Use a water-soluble fertilizer every 10 to 14 days during the summer to ensure they receive the nutrients they need. Deadheading old flowers will encourage new blooms and pruning will keep your pentas looking good. Trim back unruly foliage to the overall shape of the plant and prune major branches in the fall after blooming has ceased. You can even cut your pentas back to a few inches from the ground to rejuvenate them and create a lush, compact shrub for the following year.

Multiplication
To propagate pentas, you can either use cuttings or seeds. Cuttings can be rooted in water or with rooting powder. After that, simply pot them in moist potting medium to produce new plants that are exactly the same as the parent plant. On the other hand, growing pentas from seed requires starting them inside 7 to 9 weeks before the last expected frost in your area if you want them to bloom throughout the summer.
Starting from Seed
To start pentas from seed, fill plant trays or containers with moistened seed starter. Place the penta seeds on top of the starter and press them lightly. Do not cover the seeds as they need light to germinate. Mist the seeds and seed starter lightly to moisten them, then cover the trays with plastic wrap to hold in moisture. Place the trays on a heating mat or in a location that provides gentle bottom heat, such as on top of the water heater. Keep the soil temperature at 75 degrees Fahrenheit for the best chance of germination. Until seedlings emerge in 14 to 21 days, keep the soil moist but not too wet. Once the seedlings develop the second set of true leaves, transplant them into individual pots. When all danger of frost has passed in your area, transplant them to their outside location.
Mulching
Pentas will benefit greatly from mulching when grown in soil. Spread a 2-3 inch layer of mulch around the base of your plants. Mulch is beneficial because it helps control the growth of weeds and preserves soil moisture, making your garden more attractive in the process.